


https://www.youtube.com/watch?v=Q6VxSPlkcCg&list=PLlrfTSXS0LLKHfOfwM31jJw3SHuDnkF49&index=4
📌 세팅 리셋
- 앞전에 생성한 Service 및 MainWindow 삭제
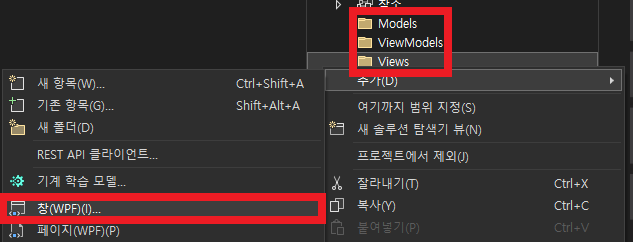
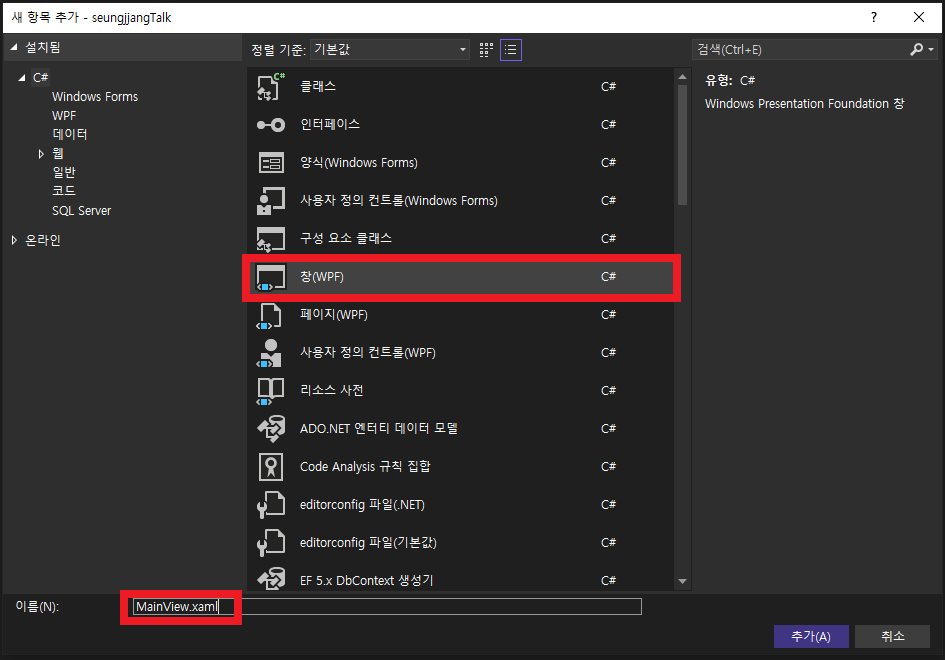
- 폴더 생성 후 wpf 창 생성
- App.xaml 수정
    public partial class App : Application
    {

        public App()
        {
            Services = ConfigureServices();
            Startup += App_Startup;

        }

        private void App_Startup(object sender, StartupEventArgs e)
        {
            var mainView = App.Current.Services.GetService<MainView>();
            mainView.Show();

        }


        public new static App Current => (App)Application.Current;

        public IServiceProvider Services { get; }

        private static IServiceProvider ConfigureServices()
        {
            var services = new ServiceCollection();

            //Views
            /* 의존성이 추가 된 MainWindow를 만들어준다. */
            services.AddSingleton<MainView>();

            return services.BuildServiceProvider();
        }

    }
📌 타이틀과 바디 부분 나누기
- MainView.xaml 에 아래와 같이 코드 추가
<Window x:Class="seungjjangTalk.Views.MainView"
xmlns="http://schemas.microsoft.com/winfx/2006/xaml/presentation"
xmlns:x="http://schemas.microsoft.com/winfx/2006/xaml"
xmlns:d="http://schemas.microsoft.com/expression/blend/2008"
xmlns:mc="http://schemas.openxmlformats.org/markup-compatibility/2006"
xmlns:local="clr-namespace:seungjjangTalk.Views"
mc:Ignorable="d"
WindowStyle="None"
Title="MainView" Height="550" Width="350">
<Grid>
<Grid.RowDefinitions>
<RowDefinition Height="auto"/>
<RowDefinition/>
</Grid.RowDefinitions>
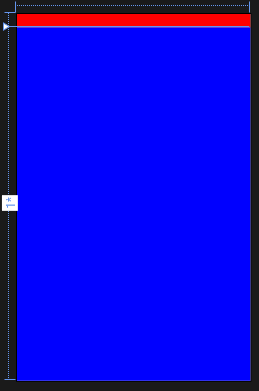
<!-- 타이틀 바 -->
<StackPanel Background="Red" Height="20"/>
<!-- 바디 -->
<StackPanel Grid.Row="1" Background="Blue"/>
</Grid>- WindowStyle="None" 으로 스타일 삭제해주기
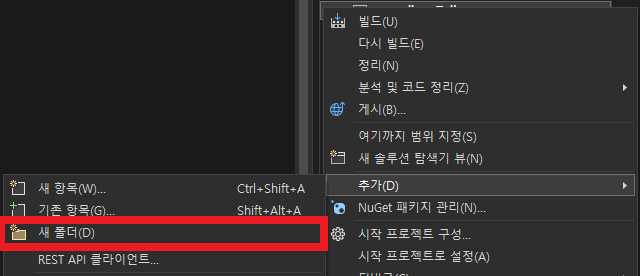
◾ Controls 파일 생성
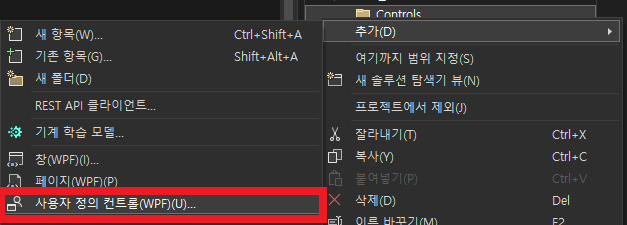
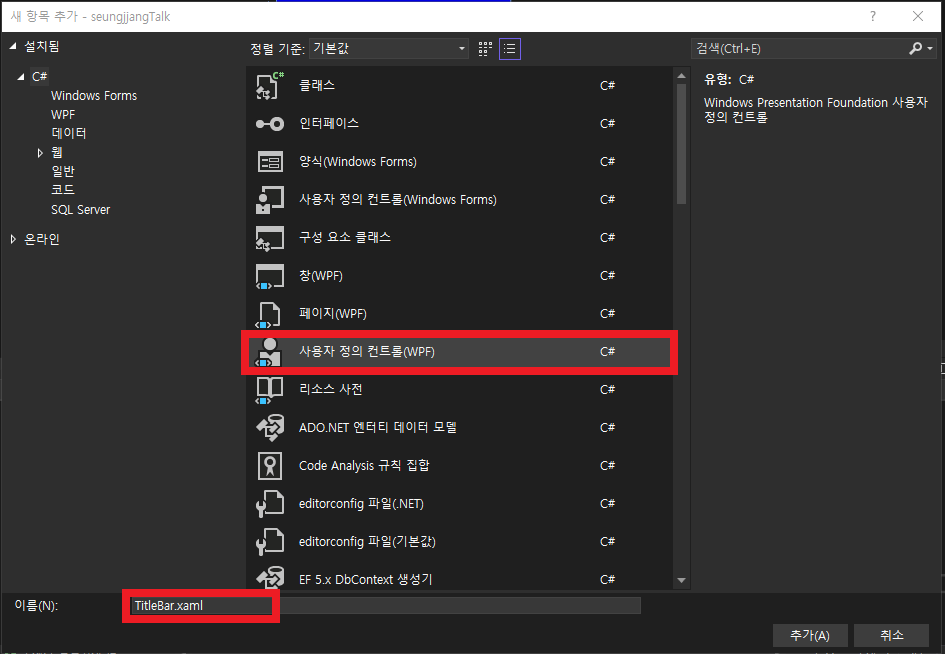
- TitleBar.xaml
<UserControl x:Class="seungjjangTalk.Controls.TitleBar"
             xmlns="http://schemas.microsoft.com/winfx/2006/xaml/presentation"
             xmlns:x="http://schemas.microsoft.com/winfx/2006/xaml"
             xmlns:mc="http://schemas.openxmlformats.org/markup-compatibility/2006"
             xmlns:d="http://schemas.microsoft.com/expression/blend/2008"
             xmlns:local="clr-namespace:seungjjangTalk.Controls"
             mc:Ignorable="d"
             d:DesignHeight="20" d:DesignWidth="200">
    <DockPanel Background="#FFFEE500"/>
</UserControl>- DesignHeight, DesignWidth 추가 및 색상 지정
- #FFFEE500 색상을 다른 곳에서도 사용 할 예정이니 스타일 추가
📌 Dictionary에 스타일 추가하기
- Styles 폴더 추가

- 리소스사전 선택 후 Colors 파일 생성
- Colors.xaml
<ResourceDictionary xmlns="http://schemas.microsoft.com/winfx/2006/xaml/presentation"
                    xmlns:x="http://schemas.microsoft.com/winfx/2006/xaml">
    <SolidColorBrush x:Key="ColorPrimary" Color="#FFFEE500"/>
</ResourceDictionary>
- App.xaml
<Application x:Class="seungjjangTalk.App"
             xmlns="http://schemas.microsoft.com/winfx/2006/xaml/presentation"
             xmlns:x="http://schemas.microsoft.com/winfx/2006/xaml"
             xmlns:local="clr-namespace:seungjjangTalk"
             StartupUri="MainWindow.xaml">
    <Application.Resources>
        <ResourceDictionary>
            <ResourceDictionary.MergedDictionaries>
                <ResourceDictionary Source="/Styles/Colors.xaml"/>
            </ResourceDictionary.MergedDictionaries>
        </ResourceDictionary>
    </Application.Resources>
</Application>
- TitleBar.xaml
<UserControl x:Class="seungjjangTalk.Controls.TitleBar"
             xmlns="http://schemas.microsoft.com/winfx/2006/xaml/presentation"
             xmlns:x="http://schemas.microsoft.com/winfx/2006/xaml"
             xmlns:mc="http://schemas.openxmlformats.org/markup-compatibility/2006"
             xmlns:d="http://schemas.microsoft.com/expression/blend/2008"
             xmlns:local="clr-namespace:seungjjangTalk.Controls"
             mc:Ignorable="d"
             d:DesignHeight="20" d:DesignWidth="200">

    <DockPanel Background="{StaticResource ColorPrimary }"/>

</UserControl>
📌 상단 버튼 만들기
- TitleBar.xaml
    <UserControl.Resources>
        <Style TargetType="{x:Type Button}">
            <Setter Property="Width" Value="25"/>
            <Setter Property="Height" Value="20"/>
            <Setter Property="DockPanel.Dock" Value="Right"/>
            <Setter Property="Background" Value="Transparent"/>
            <Setter Property="BorderBrush" Value="Transparent"/>
        </Style>
    </UserControl.Resources>

    <DockPanel Background="{StaticResource ColorPrimary }" LastChildFill="False">
        <Button/>
        <Button/>
        <Button/>

    </DockPanel>
◾ 아이콘 추가하기

button 안에서 SvgAwesome 입력 후 컨트롤 + . 을 누르면 앞전에 설치 한 SvgAwesome 을 사용 할 수 있다.
- TitleBar.xaml
    <DockPanel Background="{StaticResource ColorPrimary }" LastChildFill="False">
        <Button>
            <fa6:SvgAwesome Icon="Solid_Xmark"/>
        </Button>

        <Button>
            <fa6:SvgAwesome Icon="Regular_Square"/>
        </Button>

        <Button>
            <fa6:SvgAwesome Icon="Solid_Minus"/>
        </Button>

    </DockPanel>
◾ 버튼 색 Dictionary에 스타일 추가하기
- Colors.xaml
<ResourceDictionary xmlns="http://schemas.microsoft.com/winfx/2006/xaml/presentation"
                    xmlns:x="http://schemas.microsoft.com/winfx/2006/xaml">
    <SolidColorBrush x:Key="ColorPrimary" Color="#FFFEE500"/>
    <SolidColorBrush x:Key="ColorGray" Color="#7F7200"/>
</ResourceDictionary>
- TitleBar.xaml
     <UserControl.Resources>
 			<Style TargetType="{x:Type fa6:SvgAwesome}">
            <Setter Property="PrimaryColor" Value="{StaticResource ColorGray}"/>
        </Style>
    </UserControl.Resources>
◾ DockPanel 및 버튼 이름 설정하기
- TitleBar.xaml
    <DockPanel x:Name="pnlTitle" Background="{StaticResource ColorPrimary }" LastChildFill="False">
			<Button x:Name="btnExit">
            <fa6:SvgAwesome Icon="Solid_Xmark"/>
        </Button>

        <Button x:Name="btnMaximize">
            <fa6:SvgAwesome Icon="Regular_Square"/>
        </Button>

        <Button x:Name="btnMinimize">
            <fa6:SvgAwesome Icon="Solid_Minus"/>
        </Button>
    </DockPanel>
◾ 비하인드 코드 작성
- TitleBar.xaml.cs
    public partial class TitleBar : UserControl
    {

        public TitleBar()
        {
            InitializeComponent();
            btnExit.Click += btnExit_Click;
            btnMaximize.Click += btnMaximize_Click;
            btnMinimize.Click += btnMinimize_Click;
        }

        private void btnMinimize_Click(object sender, RoutedEventArgs e)
        {
            btnMinimize.FindParent<Window>()!.WindowState = WindowState.Minimized;
        }

        private void btnMaximize_Click(object sender, RoutedEventArgs e)
        {
            btnMaximize.FindParent<Window>()!.WindowState = WindowState.Maximized;

        }

        private void btnExit_Click(object sender, RoutedEventArgs e)
        {
            btnExit.FindParent<Window>()!.Close();
        }
    }
}
- 라이브러리 추가


라이브러리 생성 후 빌드 한 번 해 준 후 Extensions 폴더 추가 한 후 FindParentExtension 클래스 생성

- FindParentExtension.cs
namespace wpfLib.Extensions
{
    public static class FindParentExtension
    {

        //타입만 넘겨서 parent를 구하는 경우를 위해 오버로드
        public static T? FindParent<T>(this DependencyObject child)
            where T : DependencyObject
        {
            return FindParent<T>(child, null);
        }


        //재귀함수를 만든다.  T?는 Null을 타입을 나타냄. 곧 Null을 허용한다는 것
        public static T? FindParent<T>(this DependencyObject child, string? parentName)
            //형식 매개변수는 DependencyObject만 들어올 수 있도록 해 준다.
            //T 가 DependencyObject의 하위 클래스임을 보장한다.
            where T : DependencyObject
        {
            //VisualTreeHelper를 이용해서 parent의 child를 찾는다.
            var parent = VisualTreeHelper.GetParent(child);

            //parent 가 null 인경우 return null
            if(parent == null) { return null; }

            //parent를 FrameworkElement로 타입변경
            var frameworkElement = (FrameworkElement)parent;

            //만약 parentName == null인 경우 타입만 체크
            //frameworkElement Name과 parentName이 같고  FrameworkElement 타입이 맞다면 parent를 리턴하고 그렇지 않으면 재귀함수를 태운다.
            if ((parentName == null) || frameworkElement.Name == parentName && frameworkElement is T) return (T)parent; else return FindParent<T>(parent, parentName);

        }
    }
}
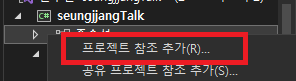
- 참조 추가

📌 타이틀 바 추가하기
- MainView.xaml
<Window x:Class="seungjjangTalk.Views.MainView"
        xmlns="http://schemas.microsoft.com/winfx/2006/xaml/presentation"
        xmlns:x="http://schemas.microsoft.com/winfx/2006/xaml"
        xmlns:d="http://schemas.microsoft.com/expression/blend/2008"
        xmlns:mc="http://schemas.openxmlformats.org/markup-compatibility/2006"
        xmlns:local="clr-namespace:seungjjangTalk.Views"
        xmlns:controls="clr-namespace:seungjjangTalk.Controls"
        mc:Ignorable="d"
        Title="MainView" Height="550" Width="350">
    <Grid>
        <Grid.RowDefinitions>
            <RowDefinition Height="auto"/>
            <RowDefinition/>
        </Grid.RowDefinitions>

        <!-- 타이틀 바 -->
        <controls:TitleBar/>

        <!-- 바디 -->
        <StackPanel Grid.Row="1" Background="Blue"/>
    </Grid>
</Window>
이후 실행 해 보면 창이 늘어나고, 최소화 되고 닫히는 것을 확인 할 수 있다.
- TitleBar.xaml.cs
        private void btnMaximize_Click(object sender, RoutedEventArgs e)
        {
            var window = btnMinimize.FindParent<Window>();
            window.WindowState = window.WindowState == WindowState.Maximized ? WindowState.Normal : WindowState.Maximized;
- 창이 Maximized 인 경우 nomal로 바꾸고 아닌 경우 Maximized처리 하도록 수정
◾ WindowChrome 설정
- 타이틀 바를 잡고 드래그하여 창을 옮길 수 있도록 설정
- MainView.xaml
...
    <WindowChrome.WindowChrome>
        <WindowChrome CaptionHeight="20" ResizeBorderThickness="2"/>
    </WindowChrome.WindowChrome>

    <Grid>
...
위 설정을 해 주고 나면 버튼이 잘 눌러지지 않는데
- TitleBar.xaml
    <UserControl.Resources>
        <Style TargetType="{x:Type Button}">
            <Setter Property="WindowChrome.IsHitTestVisibleInChrome" Value="True"/>
        </Style>
        ...
위 코드를 추가 해 주면 된다.
◾ 효율성을 위한 재귀함수 수정
- 기존 TitleBar.xaml.cs에서는 버튼을 클릭 할 때마다 재귀함수가 돌아가게되는데, 이는 효율성이 떨어진다.
아래와 같이 ParentWindow를 추가하여 window가 있으면 재귀함수를 타지 않도록 수정해준다.
- TitleBar.xaml.cs
    public partial class TitleBar : UserControl
    {

        private Window? _parentWindow;

        public Window ParentWindow
        {
            get {
                //Window가 있으면 재귀함수를 타지 않는다.
                if (_parentWindow == null) _parentWindow = this.FindParent<Window>()!;
                return _parentWindow; }
            set { _parentWindow = value; }
        }

        public TitleBar()
        {
            InitializeComponent();
            btnExit.Click += btnExit_Click;
            btnMaximize.Click += btnMaximize_Click;
            btnMinimize.Click += btnMinimize_Click;
        }

        private void btnMinimize_Click(object sender, RoutedEventArgs e)
        {
            ParentWindow.WindowState = WindowState.Minimized;
        }

        private void btnMaximize_Click(object sender, RoutedEventArgs e)
        {

            ParentWindow.WindowState = ParentWindow.WindowState == WindowState.Maximized
                ? WindowState.Normal
                : WindowState.Maximized;

        }

        private void btnExit_Click(object sender, RoutedEventArgs e)
        {
            ParentWindow.Close();
        }
    }
📌 WindowState 구독하여 높낮이 조정하기
- Titlebar.xaml.cs
    [ObservableObject]
    public partial class TitleBar : UserControl
    {

        private Window? _parentWindow;
        private WindowState _winstate;

        public WindowState WindowState
        {
            get { return _winstate; }
            set { SetProperty(ref _winstate, value); }
        }

        ...

        private void btnMinimize_Click(object sender, RoutedEventArgs e)
        {
            //WindowState 는 변환이 이루어질 때 구독
            WindowState = WindowState.Minimized;
            ParentWindow.WindowState = WindowState;
        }

        private void btnMaximize_Click(object sender, RoutedEventArgs e)
        {
            WindowState = ParentWindow.WindowState = ParentWindow.WindowState == WindowState.Maximized
                ? WindowState.Normal
                : WindowState.Maximized;

        }

        ...
[ObservableObject]을 통해 MVVM프레임워크 사용
- 여기서 SetProperty(ref _winstate, value); 를 하게 value가 바뀌게되면 PropertyChanged 이벤트가 호출하게 된다.
📌 최대화 크기 조정
- 현재 최대화하는 경우 화면을 튀어나가게 되어 Margin을 바인딩처리 하여 해결한다.
- TitleBar.xaml
<UserControl x:Class="seungjjangTalk.Controls.TitleBar"
             xmlns="http://schemas.microsoft.com/winfx/2006/xaml/presentation"
             xmlns:x="http://schemas.microsoft.com/winfx/2006/xaml"
             xmlns:mc="http://schemas.openxmlformats.org/markup-compatibility/2006"
             xmlns:d="http://schemas.microsoft.com/expression/blend/2008"
             xmlns:local="clr-namespace:seungjjangTalk.Controls"
             xmlns:fa6="http://schemas.fontawesome.com/icons/svg"
             mc:Ignorable="d"
             d:DesignHeight="20" d:DesignWidth="200"
             Name ="root">


             ...


        <Button x:Name="btnMaximize" Margin="{Binding WinState, ElementName=root, Converter={StaticResource WindowStateMarginCnverter}}">
            <fa6:SvgAwesome Icon="Regular_Square"/>
        </Button>


        ...
- Converter 파일 추가
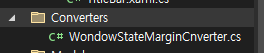
- WindowStateMarginCnverter.cs
    class WindowStateMarginCnverter : IValueConverter
    {
        public object Convert(object value, Type targetType, object parameter, CultureInfo culture)
        {
           WindowState state = (WindowState)value;
            //크기가 Normal인 경우 크기 조정 하지 않고 그렇지 않은 경우 마진 설정
            if (state == WindowState.Normal)
            {
                return new Thickness(0);
            }
            else
            {

                var param = (string)parameter;
                var right = param == "Exit" ? 7 : 0;

                return new Thickness(0, 7, right, 0);
            }
        }
- TitleBar.xaml
    <UserControl.Resources>
        <converters:WindowStateMarginCnverter x:Key="WindowStateMarginCnverter"/>

        ...
    </UserControl.Resources>

	<DockPanel x:Name="pnlTitle" Background="{StaticResource ColorPrimary }" LastChildFill="False">

        <Button x:Name="btnExit" Margin="{Binding Winstate, ElementName=root, Converter={StaticResource WindowStateMarginCnverter}, ConverterParameter=Exit}">
            <fa6:SvgAwesome Icon="Solid_Xmark"/>
        </Button>

        <Button x:Name="btnMaximize" Margin="{Binding Winstate, ElementName=root, Converter={StaticResource WindowStateMarginCnverter}}">
            <fa6:SvgAwesome Icon="Regular_Square"/>
        </Button>

        <Button x:Name="btnMinimize" Margin="{Binding Winstate, ElementName=root, Converter={StaticResource WindowStateMarginCnverter}}">
            <fa6:SvgAwesome Icon="Solid_Minus"/>
        </Button>

    </DockPanel>
📌 최대화 했을 시 아이콘 변경
- TitleBar.xaml
    <UserControl.Resources>
        <converters:WindowStateMarginCnverter x:Key="WindowStateMarginCnverter"/>
        <converters:WindowStateIconConverter x:Key="WindowStateIconConverter"/>


		...


        <Button x:Name="btnMaximize" Margin="{Binding Winstate, ElementName=root, Converter={StaticResource WindowStateMarginCnverter}}">
            <fa6:SvgAwesome Icon="{Binding Winstate, ElementName=root, Converter={StaticResource WindowStateIconConverter}}"/>
        </Button>
- WindowStateIconConverter.cs
namespace seungjjangTalk.Converters
{
    class WindowStateIconConverter : IValueConverter
    {
        public object Convert(object value, Type targetType, object parameter, CultureInfo culture)
        {
            WindowState state = (WindowState)value;
            if (state == WindowState.Normal) { return EFontAwesomeIcon.Regular_Square; } else return EFontAwesomeIcon.Solid_DownLeftAndUpRightToCenter;
        }

        public object ConvertBack(object value, Type targetType, object parameter, CultureInfo culture)
        {
            throw new NotImplementedException();
        }
    }
}


'C# > C# 프로그래밍' 카테고리의 다른 글
| [C#프로그래밍] [WPF] PC 카카오톡 만들기 #05 - 로그인 컨트롤 디자인하기 (0) | 2023.08.23 |
|---|---|
| [C#프로그래밍] [WPF] PC 카카오톡 만들기 #04 - DataTemplate로 UserControl 변경하기 (0) | 2023.08.22 |
| [C#프로그래밍] [WPF] PC 카카오톡 만들기 #02 - 의존성 주입 (0) | 2023.08.10 |
| [C#프로그래밍] [WPF] PC 카카오톡 만들기 #01 - 프로젝트 생성 및 NuGet 패키지 다운 (0) | 2023.08.10 |
| [C#프로그래밍] 계산기만들기 #02 (0) | 2023.08.09 |